前言
本篇记录学习SpringBoot框架的过程。
官网:Spring | Home
版本:
- Maven:3.6.1
- JDK:1.8
- SpringBoot:2.3.4
简介
“Spring Boot makes it easy to create stand-alone, production-grade Spring based Applications that you can ‘just run’.”
优势
-
Create stand-alone Spring applications
创建独立Spring应用
-
Embed Tomcat, Jetty or Undertow directly (no need to deploy WAR files)
内嵌web服务器
-
Provide opinionated ‘starter’ dependencies to simplify your build configuration
自动starter依赖,简化构建配置
-
Automatically configure Spring and 3rd party libraries whenever possible
自动配置Spring以及第三方功能
-
Provide production-ready features such as metrics, health checks, and externalized configuration
提供生产级别的监控、健康检查及外部化配置
-
Absolutely no code generation and no requirement for XML configuration
无代码生成、无需编写XML
快速入门
以构建一个简单的HelloWorldweb应用为例。
工程创建
新建一个maven工程
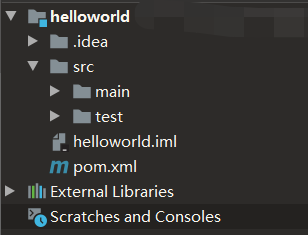
配置pom.xml文件,引入两个依赖:
1
2
3
4
5
6
7
8
9
10
11
12
13
14
15
16
17
18
19
20
21
22
23
24
| <?xml version="1.0" encoding="UTF-8"?>
<project xmlns="http://maven.apache.org/POM/4.0.0"
xmlns:xsi="http://www.w3.org/2001/XMLSchema-instance"
xsi:schemaLocation="http://maven.apache.org/POM/4.0.0 http://maven.apache.org/xsd/maven-4.0.0.xsd">
<modelVersion>4.0.0</modelVersion>
<groupId>org.example</groupId>
<artifactId>helloworld</artifactId>
<version>1.0-SNAPSHOT</version>
<parent>
<groupId>org.springframework.boot</groupId>
<artifactId>spring-boot-starter-parent</artifactId>
<version>2.3.4.RELEASE</version>
</parent>
<dependencies>
<dependency>
<groupId>org.springframework.boot</groupId>
<artifactId>spring-boot-starter-web</artifactId>
</dependency>
</dependencies>
</project>
|
创建目录src/main/java/boot,并在其中创建主程序MainApplication
1
2
3
4
5
6
7
8
9
10
11
12
13
14
| import org.springframework.boot.SpringApplication;
import org.springframework.boot.autoconfigure.SpringBootApplication;
@SpringBootApplication
public class MainApplication {
public static void main(String[] args) {
SpringApplication.run(MainApplication.class,args);
}
}
|
无需配置tomcat,直接运行该主程序启动web服务
创建目录src/main/java/boot/controller,并在其中编写业务类HelloController:
1
2
3
4
5
6
7
8
9
10
11
| import org.springframework.web.bind.annotation.RequestMapping;
import org.springframework.web.bind.annotation.RestController;
@RestController
public class HelloController {
@RequestMapping("/hello")
public String handle01() {
return "Hello, SpringBoot2!";
}
}
|
说明:
注解@RestController源码中包含@Controller以及@ResponseBody
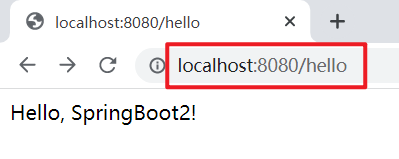
运行主程序,访问默认端口(8080),即可看到展示信息:

配置
在目录src/main/resources下创建配置文件application.properties:
说明:
这里web服务的修改运行端口
更多配置信息可查看官网:Common Application Properties (spring.io)
部署
在pom.xml配置文件中导入如下依赖:
1
2
3
4
5
6
7
8
| <build>
<plugins>
<plugin>
<groupId>org.springframework.boot</groupId>
<artifactId>spring-boot-maven-plugin</artifactId>
</plugin>
</plugins>
</build>
|
可以将项目直接打成jar包
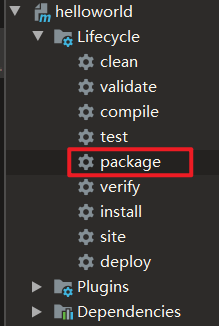
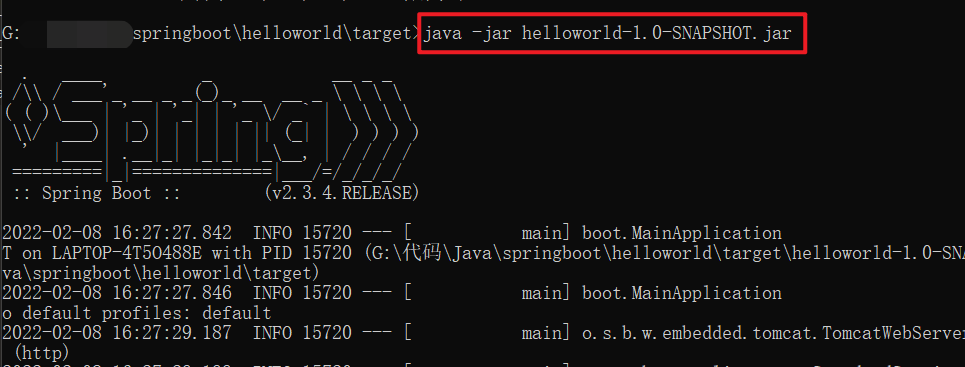
在jar包存在的目录下,启动cmd,直接运行:
依赖管理说明
父项目依赖管理
在上述案例中可以看到在配置pom.xml配置文件时,引入父依赖管理:
1
2
3
4
5
| <parent>
<groupId>org.springframework.boot</groupId>
<artifactId>spring-boot-starter-parent</artifactId>
<version>2.3.4.RELEASE</version>
</parent>
|
查看源码可以看到它的父项目如下:
1
2
3
4
5
| <parent>
<groupId>org.springframework.boot</groupId>
<artifactId>spring-boot-dependencies</artifactId>
<version>2.3.4.RELEASE</version>
</parent>
|
再次点击其源码查看,就可以看到各种依赖:
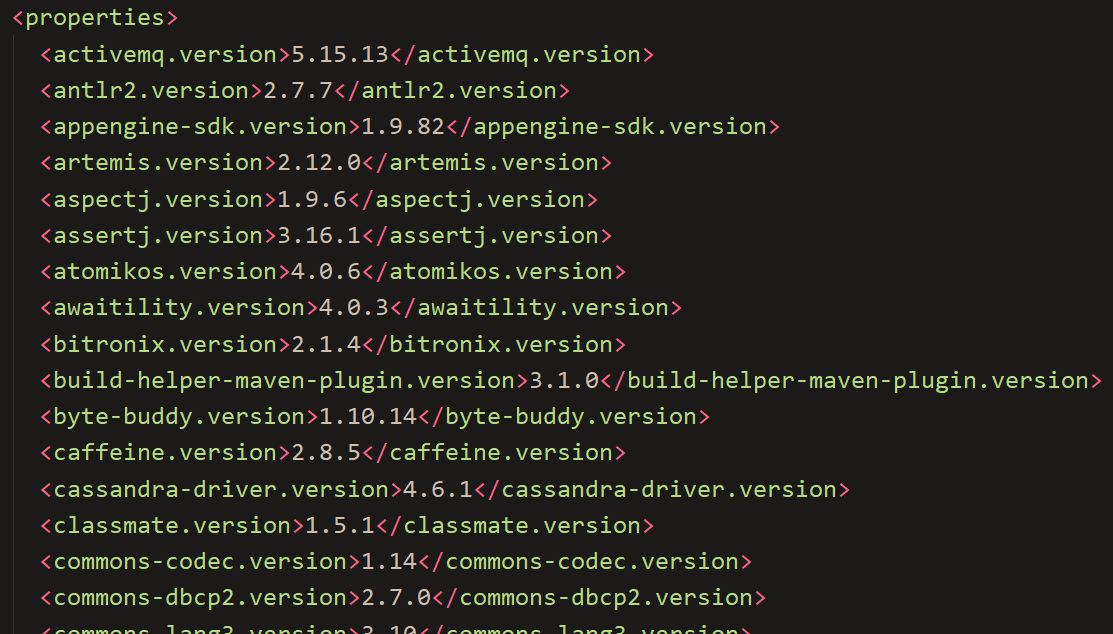
几乎声明了所有开发中常用的依赖的版本号——自动版本仲裁机制。这也就使得在pom.xml配置文件中添加所需依赖不用配置版本号(会有默认)。
如果需要的依赖版本跟默认有冲突,可以手动更改版本号(以mysql为例):
1
2
3
4
| <dependency>
<groupId>mysql</groupId>
<artifactId>mysql-connector-java</artifactId>
</dependency>
|
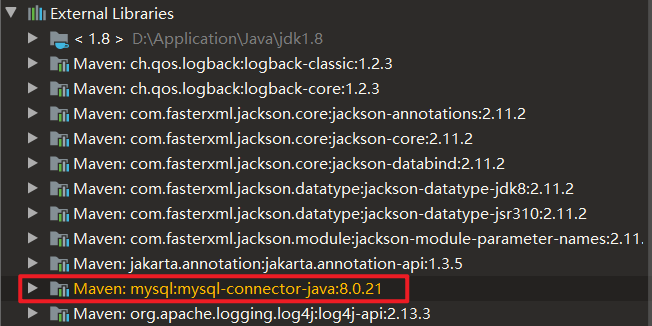
可以看到默认版本为8.0.21
更改版本号有两种方式:
-
直接添加版本号:
1
2
3
4
5
| <dependency>
<groupId>mysql</groupId>
<artifactId>mysql-connector-java</artifactId>
<version>5.1.43</version>
</dependency>
|
-
添加<properties>配置:
1
2
3
4
5
6
7
8
9
10
| <properties>
<mysql.version>5.1.43</mysql.version>
</properties>
<dependencies>
<dependency>
    <groupId>mysql</groupId>
    <artifactId>mysql-connector-java</artifactId>
</dependency>
</dependencies>
|
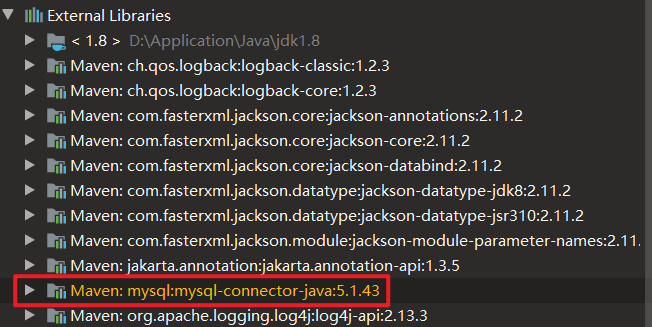
说明:
如果配置少的话可以选择直接添加版本号;如果多的话建议用<properties>配置,便于管理。
starter场景启动器
以spring-boot-starter-web为例,官方给出了许多spring-boot-starter-*(*就是某种场景),只要引入starter,这个场景的所有常规需要的依赖都会自动引入。
Developing with Spring Boot
第三方提供的简化开发的场景启动器(命名规范):*-spring-boot-starter
所有场景启动器最底层的依赖如下:
1
2
3
4
5
6
| <dependency>
<groupId>org.springframework.boot</groupId>
<artifactId>spring-boot-starter</artifactId>
<version>2.3.4.RELEASE</version>
<scope>compile</scope>
</dependency>
|
自动配置
组件配置
点击查看spring-boot-starter-web源码可以看到,已经自动化配置了Tomcat依赖、SpringMVC全套组件:
1
2
3
4
5
6
7
8
9
10
11
12
13
14
15
16
17
18
19
20
21
22
23
24
25
26
27
28
29
30
31
32
| <dependencies>
<dependency>
  <groupId>org.springframework.boot</groupId>
  <artifactId>spring-boot-starter</artifactId>
  <version>2.3.4.RELEASE</version>
  <scope>compile</scope>
</dependency>
<dependency>
<groupId>org.springframework.boot</groupId>
<artifactId>spring-boot-starter-json</artifactId>
<version>2.3.4.RELEASE</version>
<scope>compile</scope>
</dependency>
<dependency>
<groupId>org.springframework.boot</groupId>
<artifactId>spring-boot-starter-tomcat</artifactId>
<version>2.3.4.RELEASE</version>
<scope>compile</scope>
</dependency>
<dependency>
<groupId>org.springframework</groupId>
<artifactId>spring-web</artifactId>
<version>5.2.9.RELEASE</version>
<scope>compile</scope>
</dependency>
<dependency>
<groupId>org.springframework</groupId>
<artifactId>spring-webmvc</artifactId>
<version>5.2.9.RELEASE</version>
<scope>compile</scope>
</dependency>
</dependencies>
|
组件扫描
主程序所在包及其下面的所有子包里面的组件都会被默认扫描进来,因此无需配置包扫描。
如果想要改变包扫描目录,有两种方式:
- 在主程序类之前配置注解
@SpringBootApplication(scanBasePackages="xxx")
- 在主程序类之前添加注解
@ComponentScan("xxx")
后记
Spring家族中必须掌握的一课。


