前言
介绍SpringBoot关于Web开发的内容
版本:
- Maven:3.6.1
- JDK:1.8
- SpringBoot:2.3.4
项目搭建
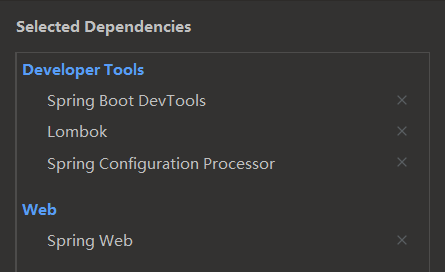
使用Spring Initializr快速创建一个项目,引入的依赖如下:
配置文件自行创建:application.yaml
简单功能
静态资源访问
静态资源目录
总共有四个默认静态资源目录:/static、/public、/resources、/META-INF/resources
加载顺序:META-INF/resources → resources → static → public
访问方式:当前项目根路径/ + 静态资源名
示例:
首先在/resources目录下创建以上四个静态资源目录,并分别存放一张图片资源
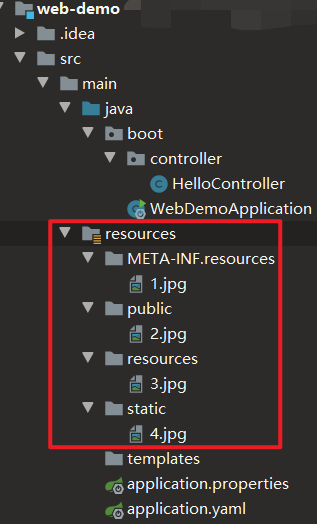
启动项目,浏览器访问资源(仅展示一张图片):
注意,如果动态请求路径与静态资源重复,则优先访问动态请求。
在src/main/java/boot/controller目录下新建HelloController类:
1
2
3
4
5
6
7
8
9
10
11
| import org.springframework.web.bind.annotation.RequestMapping;
import org.springframework.web.bind.annotation.RestController;
@RestController
public class HelloController {
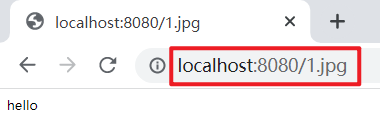
@RequestMapping("/1.jpg")
public String hello() {
return "hello";
}
}
|
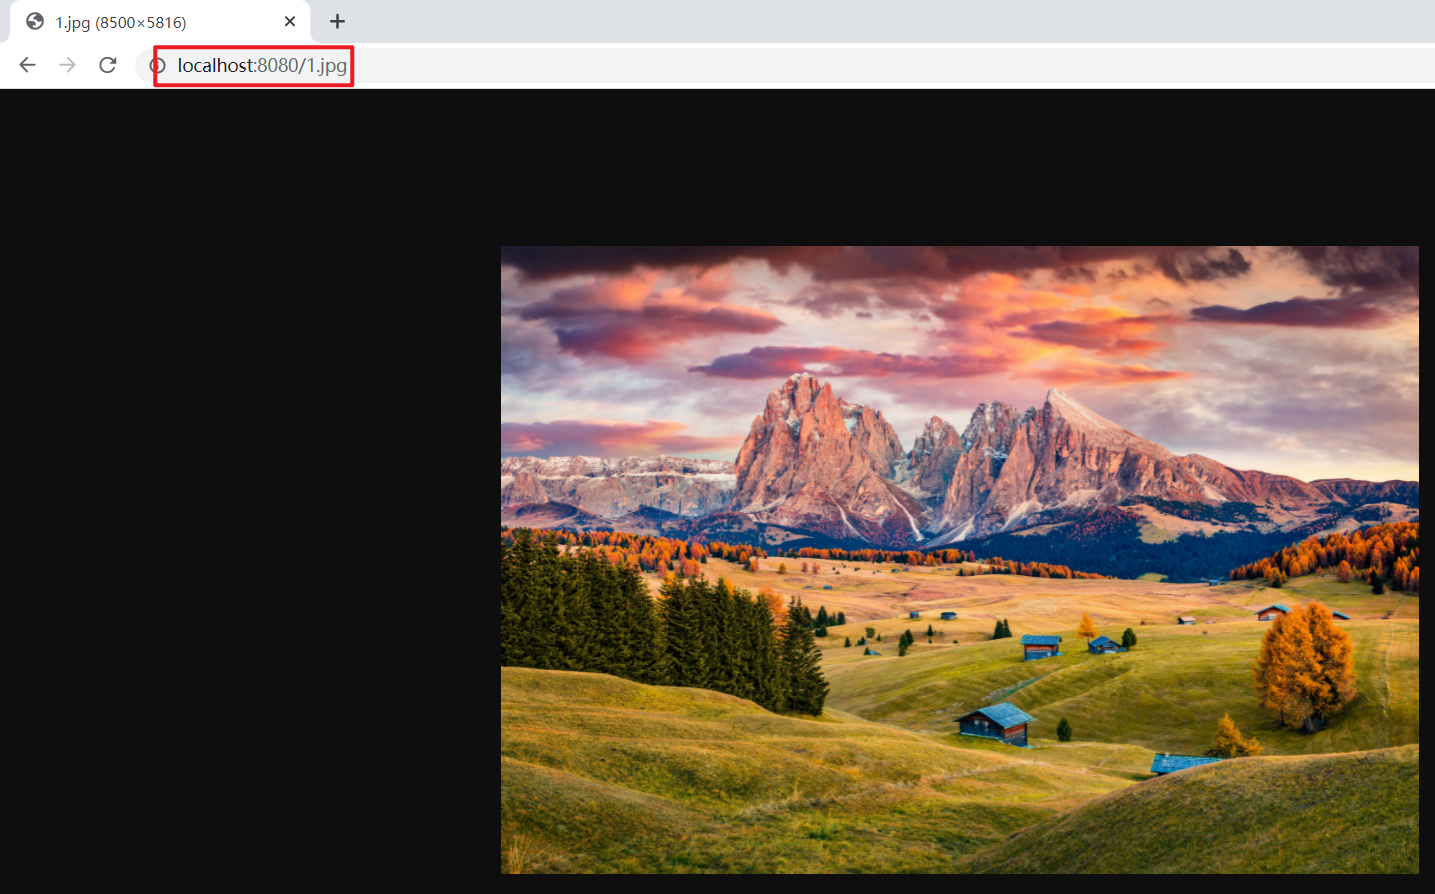
启动服务,浏览器访问资源:http://localhost:8080/1.jpg
说明:默认静态映射/**
访问请求进来,先去找Controller看是否能处理,不能处理的所有请求又都交给静态资源处理器。(静态资源也找不到则响应404页面)
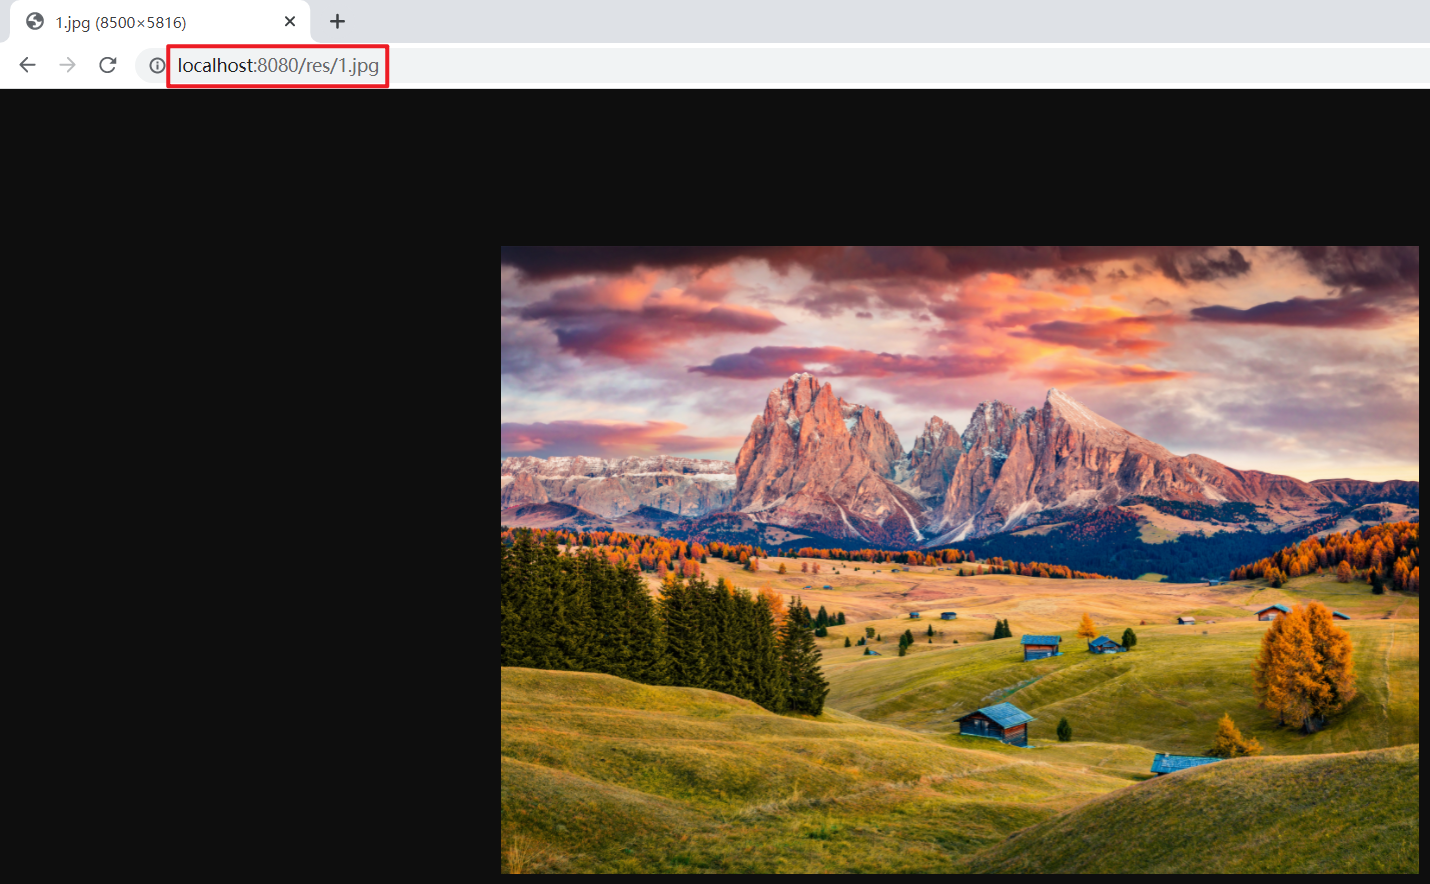
为了防止动态请求和静态资源请求冲突的情况发生,一般会在配置文件中修改静态资源访问前缀:
1
2
3
| spring:
mvc:
static-path-pattern: /res/**
|
重启启动服务,浏览器访问资源:http://localhost:8080/res/1.jpg
除了默认的静态资源访问目录,也可以在配置文件中手动配置目录:
1
2
3
| spring:
resources:
static-locations: [classpath:/pic/]
|
静态资源访问规则
通过配置add-mappings可以控制禁用/使用静态访问规则:
1
2
3
| spring:
resources:
add-mappings: false
|
缓存
可以配置缓存时长(单位:秒):
1
2
3
4
| spring:
resources:
cache:
period: 8000
|
注:以下内容静态资源目录均默认为/static
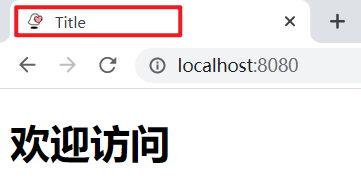
欢迎页面
创建一个名为index.html的首页放到静态资源目录下:
1
2
3
4
5
6
7
8
9
10
| <!DOCTYPE html>
<html lang="en">
<head>
<meta charset="UTF-8">
<title>Title</title>
</head>
<body>
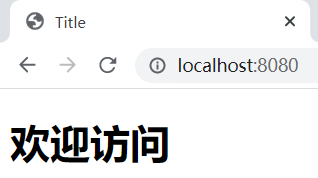
<h1>欢迎访问</h1>
</body>
</html>
|
启动服务,访问:http://localhost:8080/
注意:配置静态资源访问前缀会导致WelcomePage功能失效
查看源码可以发现,官方在加载WelcomePage时就将访问规则写死为/**了:
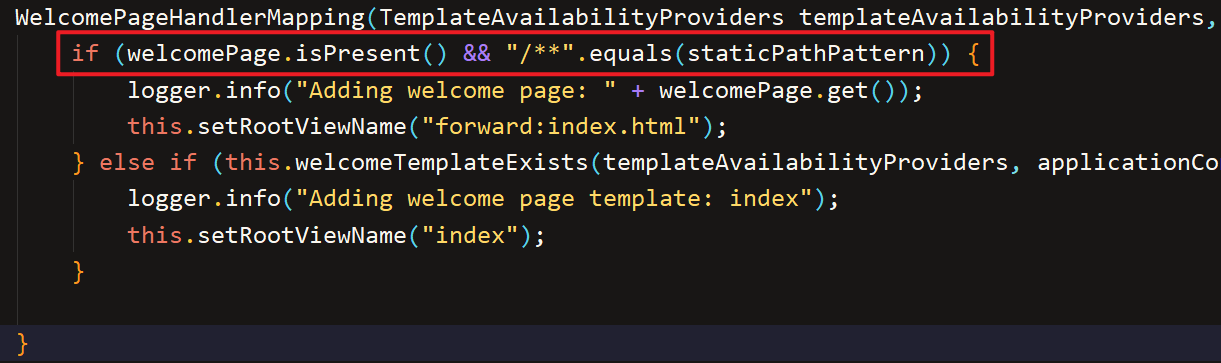
(上图为2.6.3的版本)
自定义Favicon
将自定义的favicon.ico文件放到静态资源目录中:
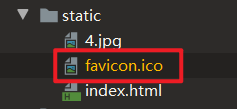
启动服务,访问:http://localhost:8080/
注意:
- 名称必须为:
favicon.ico
- 配置静态资源访问前缀会导致Favicon功能失效
请求参数处理
请求映射
在实际项目中可以编写不同的动态请求以达到“增删改查”功能:
1
2
3
4
5
6
7
8
9
10
11
12
13
14
15
16
17
18
19
20
21
| @RequestMapping("/getUser")
public String getUser() {
return "GET-张三";
}
@RequestMapping("/saveUser")
public String saveUser() {
return "POST-张三";
}
@RequestMapping("/editUser")
public String putUser() {
return "PUT-张三";
}
@RequestMapping("/deleteUser")
public String deleteUser() {
return "DELETE-张三";
}
|
也可以使用Rest风格请求(使用HTTP请求方式动词来表示对资源的操作),有两种注解方式:
@RequestMapping(value = "/user", method = RequestMethod.xxx)@xxxMapping("/user")
示例:
编辑HelloController类:
1
2
3
4
5
6
7
8
9
10
11
12
13
14
15
16
17
18
19
20
21
22
23
24
25
26
27
28
29
30
31
32
33
| package boot.controller;
import org.springframework.web.bind.annotation.*;
@RestController
public class HelloController {
@GetMapping("/user")
public String getUser() {
return "GET-张三";
}
@PostMapping("/user")
public String saveUser() {
return "POST-张三";
}
@PutMapping("/user")
public String putUser() {
return "PUT-张三";
}
@DeleteMapping("/user")
public String deleteUser() {
return "DELETE-张三";
}
}
|
编辑index.html页面:
1
2
3
4
5
6
7
8
9
10
11
12
13
14
15
16
17
18
19
20
21
22
23
24
25
| <!DOCTYPE html>
<html lang="en">
<head>
<meta charset="UTF-8">
<title>Title</title>
</head>
<body>
<h1>首页</h1>
<h3>测试Rest风格:</h3>
<form action="/user" method="get">
<input value="REST-GET 提交" type="submit"/>
</form>
<form action="/user" method="post">
<input value="REST-POST 提交" type="submit"/>
</form>
<form action="/user" method="post">
<input name="_method" type="hidden" value="DELETE"/>
<input value="REST-DELETE 提交" type="submit"/>
</form>
<form action="/user" method="post">
<input name="_method" type="hidden" value="PUT"/>
<input value="REST-PUT 提交" type="submit"/>
</form>
</body>
</html>
|
在application.yaml配置文件中开启HiddenHttpMethodFilter:
1
2
3
4
5
| spring:
mvc:
hiddenmethod:
filter:
enabled: true
|
说明:
手动开启开启HiddenHttpMethodFilter的目的在于,SpringBoot中无法直接发送除GET、POST之外的其他请求,需要在表单提交时添加隐藏域。
1
| <input name="_method" type="hidden" value="xxx"/>
|
如果在实际项目实战中采用前后端分离操作(仅作后端),则可以不用开启(例如使用Vue时可以直接发送DELETE请求)。
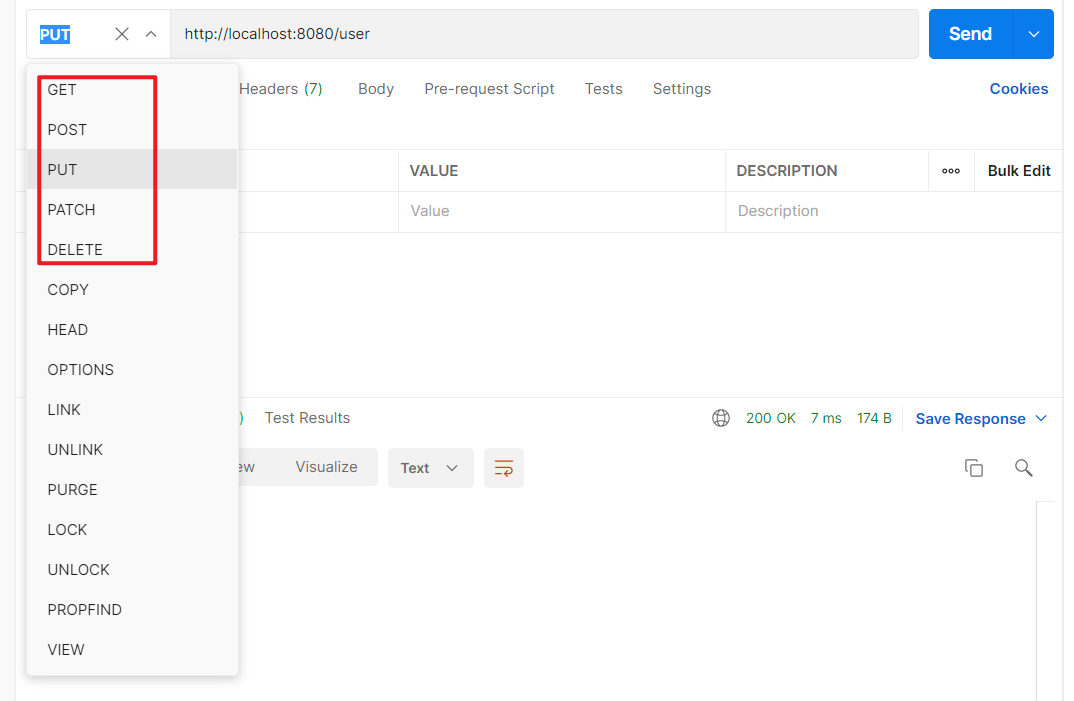
运行服务,浏览器发送请求:
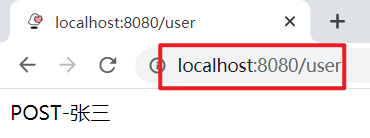
使用Postman可以直接设置请求类型:
普通参数与基本注解
在src/main/java/boot/controller目录下编写ParameterTestController类
@PathVariable
获取get请求的参数:@PathVariable("xxx")
编写ParameterTestController类:
1
2
3
4
5
6
7
8
9
10
11
12
13
14
15
16
17
| import org.springframework.web.bind.annotation.*;
import java.util.HashMap;
import java.util.Map;
@RestController
public class ParameterTestController {
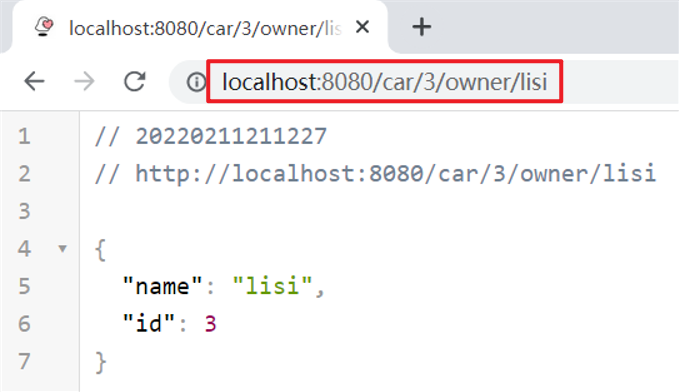
@GetMapping("/car/{id}/owner/{username}")
public Map<String, Object> getCar(@PathVariable("id") Integer id,
@PathVariable("username") String name) {
Map<String,Object> map = new HashMap<>();
map.put("id",id);
map.put("name",name);
return map;
}
}
|
运行服务,浏览器访问:http://localhost:8080/car/3/owner/lisi
也可以通过集合的方式一次性获取全部参数:
1
2
3
4
5
6
7
8
9
10
11
12
13
14
15
| import org.springframework.web.bind.annotation.*;
import java.util.HashMap;
import java.util.Map;
@RestController
public class ParameterTestController {
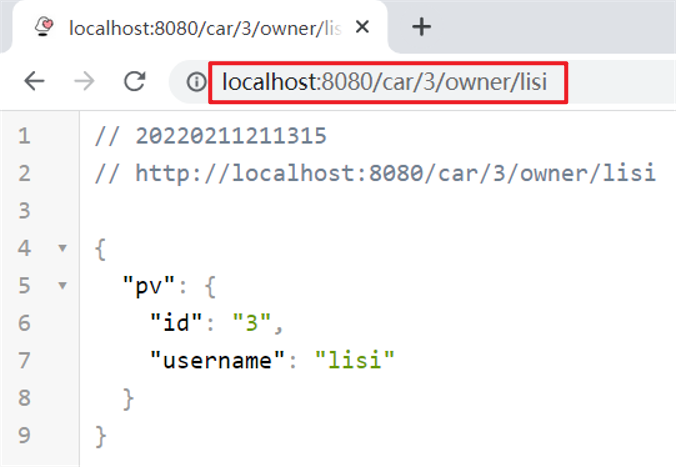
@GetMapping("/car/{id}/owner/{username}")
public Map<String, Object> getCar(@PathVariable Map<String, String> pv) {
Map<String,Object> map = new HashMap<>();
map.put("pv",pv);
return map;
}
}
|
运行服务,浏览器访问:http://localhost:8080/car/3/owner/lisi
@RequestParam
获取get请求的参数:@RequestParam("xxx")
可以获取指定参数:
1
2
3
4
5
6
7
8
9
10
11
12
13
14
15
16
17
18
| import org.springframework.web.bind.annotation.*;
import java.util.HashMap;
import java.util.List;
import java.util.Map;
@RestController
public class ParameterTestController {
@GetMapping("/car/{id}/owner/{username}")
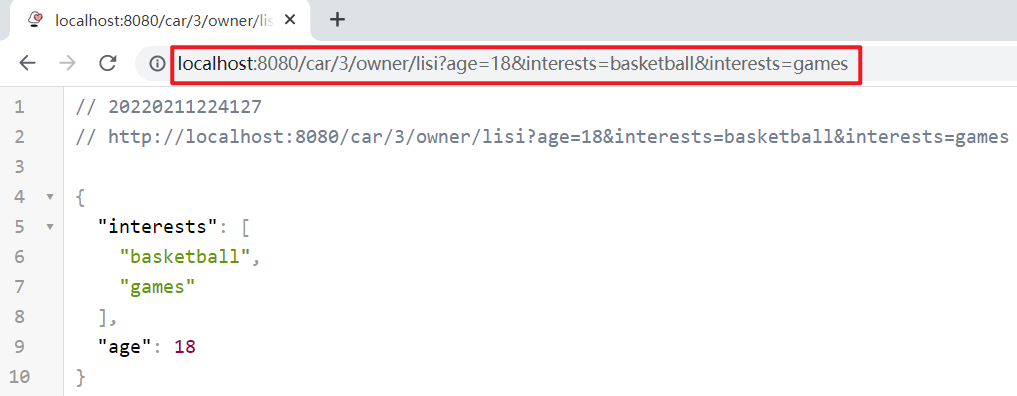
public Map<String, Object> getCar(@RequestParam("age") Integer age,
@RequestParam("interests") List<String> interests) {
Map<String,Object> map = new HashMap<>();
map.put("age",age);
map.put("interests",interests);
return map;
}
}
|
运行服务,浏览器访问:http://localhost:8080/car/3/owner/lisi?age=18&interests=basketball&interests=games
也可以通过集合一次性获取全部参数:
1
2
3
4
5
6
7
8
9
10
11
12
13
14
15
| import org.springframework.web.bind.annotation.*;
import java.util.HashMap;
import java.util.Map;
@RestController
public class ParameterTestController {
@GetMapping("/car/{id}/owner/{username}")
public Map<String, Object> getCar(@RequestParam Map<String,String> params) {
Map<String,Object> map = new HashMap<>();
map.put("params",params);
return map;
}
}
|
运行服务,浏览器访问:http://localhost:8080/car/3/owner/lisi?age=18&interests=basketball&interests=games
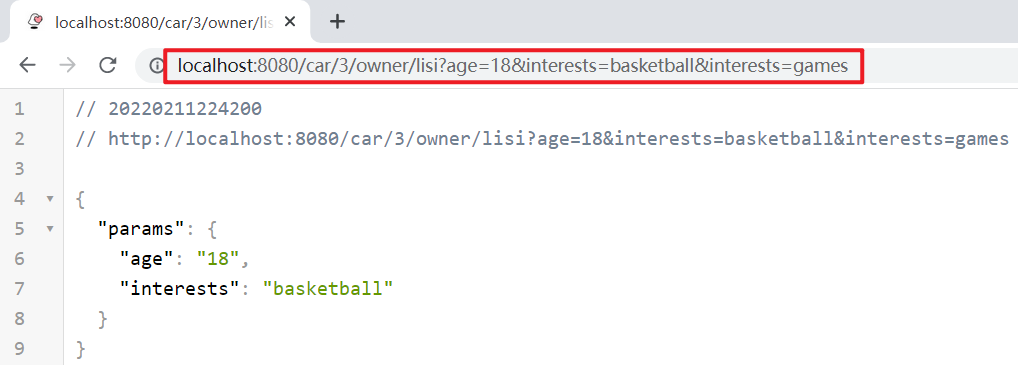
说明:由于Map只有一对键值对,因此interests只包含了“basketball”
获取请求头部信息:@RequestHeader("xxx")
可以单独获取某一条头部信息,也可以利用集合获取全部信息:
1
2
3
4
5
6
7
8
9
10
11
12
13
14
15
16
| import org.springframework.web.bind.annotation.*;
import java.util.HashMap;
import java.util.Map;
@RestController
public class ParameterTestController {
@GetMapping("/car/{id}/owner/{username}")
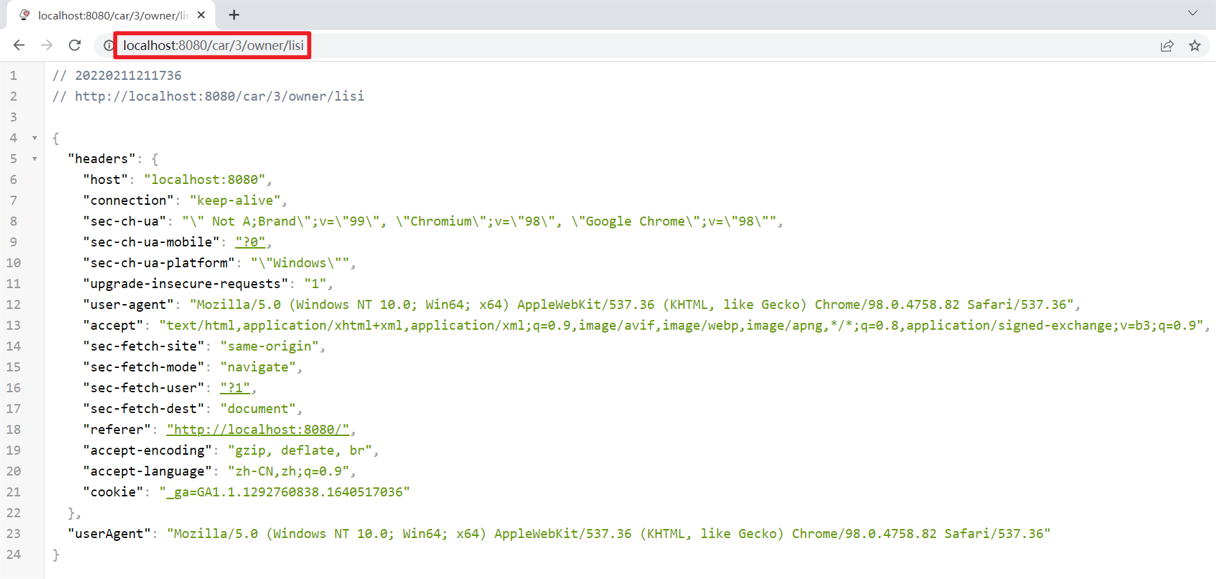
public Map<String, Object> getCar(@RequestHeader("User-Agent") String userAgent,
@RequestHeader Map<String,String> header) {
Map<String,Object> map = new HashMap<>();
map.put("userAgent",userAgent);
map.put("headers",header);
return map;
}
}
|
运行服务,浏览器访问:http://localhost:8080/car/3/owner/lisi
@CookieValue
获取cookie值:@CookieValue("xxx")
可以获取指定cookie值(String、cookie类型):
1
2
3
4
5
6
7
8
9
10
11
12
13
14
15
16
17
18
19
| import org.springframework.web.bind.annotation.*;
import javax.servlet.http.Cookie;
import java.util.HashMap;
import java.util.Map;
@RestController
public class ParameterTestController {
@GetMapping("/car/{id}/owner/{username}")
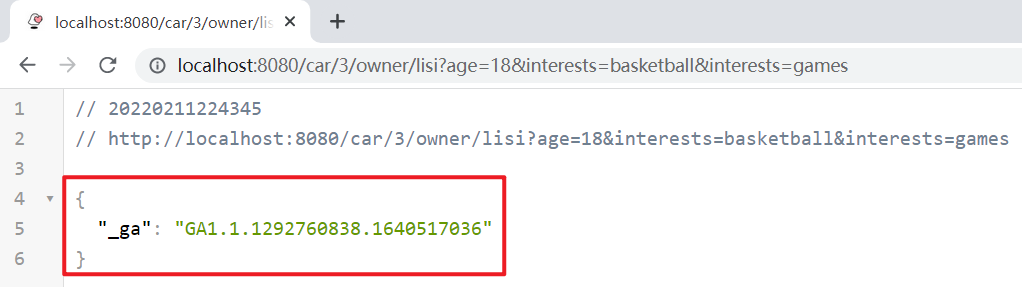
public Map<String, Object> getCar(@CookieValue("_ga") String _ga,
@CookieValue("_ga") Cookie cookie) {
Map<String,Object> map = new HashMap<>();
map.put("_ga",_ga);
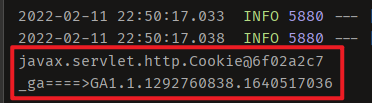
System.out.println(cookie);
System.out.println(cookie.getName() + "====>" + cookie.getValue());
return map;
}
}
|
注意cookie类型的导包:import javax.servlet.http.Cookie;
运行服务,浏览器访问:http://localhost:8080/car/3/owner/lisi?age=18&interests=basketball&interests=games
@PostMapping
获取post请求参数:
1
2
3
4
5
6
7
8
9
10
11
12
13
14
15
| import org.springframework.web.bind.annotation.*;
import java.util.HashMap;
import java.util.Map;
@RestController
public class ParameterTestController {
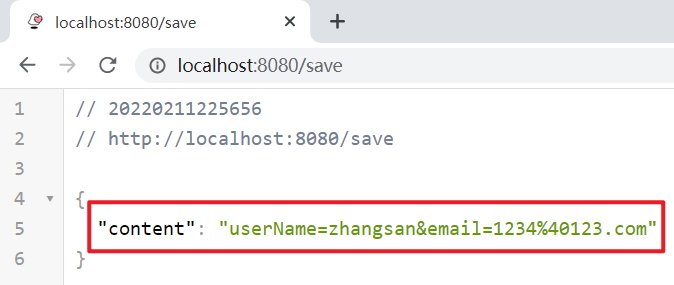
@PostMapping("/save")
public Map postMethod(@RequestBody String content) {
Map<String,Object> map = new HashMap<>();
map.put("content",content);
return map;
}
}
|
编写index.html,构造一个表单:
1
2
3
4
5
6
7
8
9
10
11
12
13
14
15
16
17
| <!DOCTYPE html>
<html lang="en">
<head>
<meta charset="UTF-8">
<title>Title</title>
</head>
<body>
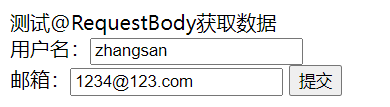
<form action="/save" method="post">
测试@RequestBody获取数据 <br/>
用户名:<input name="userName"/> <br>
邮箱:<input name="email"/>
<input type="submit" value="提交"/>
</form>
</body>
</html>
|
运行服务,填写表单信息,提交:
@RequestAttribute
获取request域属性(页面转发时获取携带的参数):@RequestAttribute("xxx)
在src/main/java/boot/controller目录下编写RequestController类:
1
2
3
4
5
6
7
8
9
10
11
12
13
14
15
16
17
18
19
20
21
22
23
24
25
26
27
28
29
30
31
32
33
34
35
36
| import org.springframework.stereotype.Controller;
import org.springframework.web.bind.annotation.GetMapping;
import org.springframework.web.bind.annotation.RequestAttribute;
import org.springframework.web.bind.annotation.ResponseBody;
import javax.servlet.http.HttpServletRequest;
import java.util.HashMap;
import java.util.Map;
@Controller
public class RequestController {
@GetMapping("/goto")
public String goToPage(HttpServletRequest request) {
request.setAttribute("msg", "成功!!!!");
request.setAttribute("code", 200);
return "forward:/success";
}
@ResponseBody
@GetMapping("/success")
public Map success(@RequestAttribute("msg") String msg,
@RequestAttribute("code") Integer code,
HttpServletRequest request) {
Object msg1 = request.getAttribute("msg");
Map<String,Object> map = new HashMap<>();
map.put("annotation_msg",msg);
map.put("annotation_code",code);
map.put("reqMethod_msg", msg1);
return map;
}
}
|
说明:
- 这里用动态请求模拟success页面(由goto请求跳转至success)
- 携带“msg”和“code”两个参数
- 可以通过
@RequestAttribute("xxx")注解的方式获取,也可以通过原始HttpServletRequest获取
启动服务,浏览器访问:http://localhost:8080/goto

Thymeleaf模板引擎
简介
Thymeleaf是一款用于渲染XML/XHTML/HTML5内容的模板引擎,类似JSP,Velocity,FreeMaker等,它也可以轻易的与Spring MVC等Web框架进行集成作为Web应用的模板引擎。
官网:Thymeleaf
使用
在pom.xml配置文件中引入相关依赖:
1
2
3
4
| <dependency>
<groupId>org.springframework.boot</groupId>
<artifactId>spring-boot-starter-thymeleaf</artifactId>
</dependency>
|
在HTML头中themeleaf的名称空间:
1
| <html xmlns:th="http://www.thymeleaf.org">
|
基本语法
表达式
| 表达式名字 |
语法 |
用途 |
| 变量取值 |
${…} |
获取请求域、session域、对象等值 |
| 选择变量 |
*{…} |
获取上下文对象值 |
| 消息 |
#{…} |
获取国际化等值 |
| 链接 |
@{…} |
生成链接 |
| 片段表达式 |
~{…} |
jsp:include 作用,引入公共页面片段 |
文本操作
- 字符串拼接:
+
- 变量替换:
The name is ${xxx}
数学运算
布尔运算
比较运算
条件运算
- If-then:
(if) ? (then)
- If-then-else:
(if) ? (then) : (else)
- Default:
?: (defaultvalue)
设置属性值
设置单个值:
1
2
3
4
5
6
| <form action="subscribe.html" th:attr="action=@{/subscribe}">
<fieldset>
<input type="text" name="email" />
<input type="submit" value="Subscribe!" th:attr="value=#{subscribe.submit}"/>
</fieldset>
</form>
|
设置多个值:
1
| <img src="../../images/gtvglogo.png" th:attr="src=@{/images/gtvglogo.png},title=#{logo},alt=#{logo}" />
|
简化写法:th:xxx
1
2
| <input type="submit" value="Subscribe!" th:value="#{subscribe.submit}"/>
<form action="subscribe.html" th:action="@{/subscribe}">
|
说明:所有h5兼容的标签写法
https://www.thymeleaf.org/doc/tutorials/3.0/usingthymeleaf.html#setting-value-to-specific-attributes
示例
在src/main/java/boot/controller目录下编写ViewTestController类:
1
2
3
4
5
6
7
8
9
10
11
12
13
14
15
16
| import org.springframework.stereotype.Controller;
import org.springframework.ui.Model;
import org.springframework.web.bind.annotation.GetMapping;
@Controller
public class ViewTestController {
@GetMapping("/viewtest")
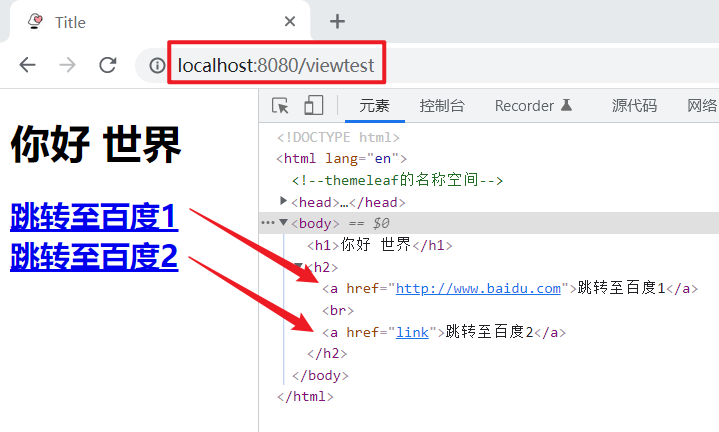
public String viewtest(Model model) {
model.addAttribute("msg","你好 世界");
model.addAttribute("link","http://www.baidu.com");
return "success";
}
}
|
说明:
参数中创建model,其中的数据会被放在请求域request中,被页面解析
在src/main/resources/templates目录中新建success.html页面:
1
2
3
4
5
6
7
8
9
10
11
12
13
14
15
16
17
| <!DOCTYPE html>
<html xmlns:th="http://www.thymeleaf.org">
<html lang="en">
<head>
<meta charset="UTF-8">
<title>Title</title>
</head>
<body>
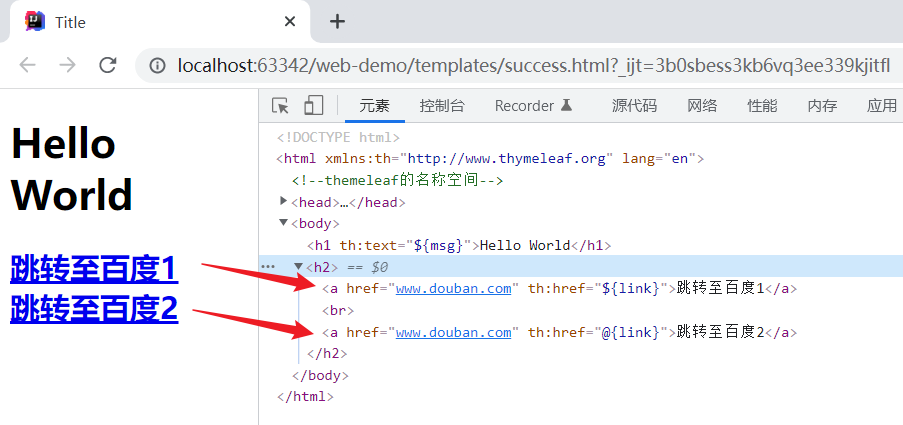
<h1 th:text="${msg}">Hello World</h1>
<h2>
<a href="www.douban.com" th:href="${link}">跳转至百度1</a> <br>
<a href="www.douban.com" th:href="@{link}">跳转至百度2</a>
</h2>
</body>
</html>
|
直接打开页面结果如下:
启动服务,浏览器访问:http://localhost:8080/viewtest
说明:
${link}:完全替换link所指代的链接@{link}:将“link”作为链接
@{/xxx}的语法可以拼接相对链接。
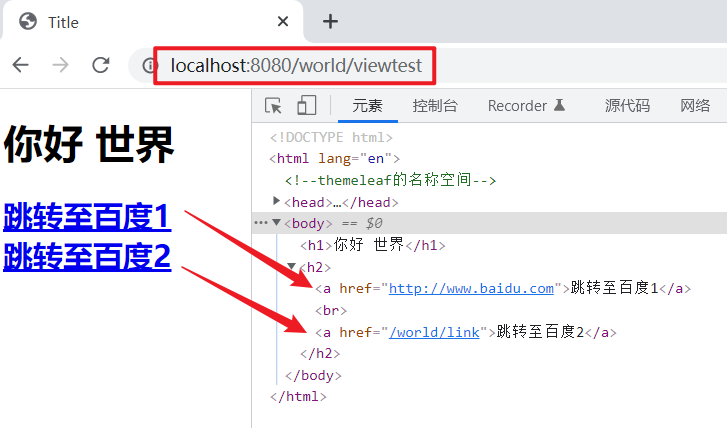
在application.yaml中配置访问前缀:
1
2
3
| server:
servlet:
context-path: /world
|
修改success.html页面:
1
| <a href="www.douban.com" th:href="@{/link}">跳转至百度2</a>
|
启动服务,浏览器访问:http://localhost:8080/world/viewtest
后记
现在开发通常用前后端分离的形式,Thymeleaf模板的内容涉及的较少,以后再慢慢补充。
ps:我的博客即将同步至腾讯云+社区,邀请大家一同入驻:https://cloud.tencent.com/developer/support-plan?invite_code=6svb7zj3u52
 微信
微信 支付宝
支付宝