前言
本篇记录学习SpringBoot框架的过程。
官网:Spring | Home
版本:
- Maven:3.6.1
- JDK:1.8
- SpringBoot:2.3.4
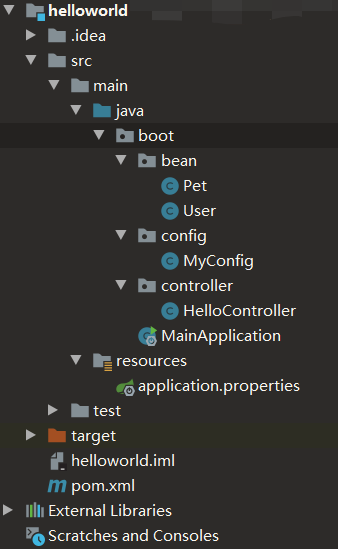
项目搭建:
创建一个maven项目:
pom.xml配置文件:
1
2
3
4
5
6
7
8
9
10
11
12
13
14
15
16
17
18
19
20
21
22
23
24
25
26
27
28
29
30
31
32
33
| <?xml version="1.0" encoding="UTF-8"?>
<project xmlns="http://maven.apache.org/POM/4.0.0"
xmlns:xsi="http://www.w3.org/2001/XMLSchema-instance"
xsi:schemaLocation="http://maven.apache.org/POM/4.0.0 http://maven.apache.org/xsd/maven-4.0.0.xsd">
<modelVersion>4.0.0</modelVersion>
<groupId>org.example</groupId>
<artifactId>helloworld</artifactId>
<version>1.0-SNAPSHOT</version>
<parent>
<groupId>org.springframework.boot</groupId>
<artifactId>spring-boot-starter-parent</artifactId>
<version>2.3.4.RELEASE</version>
</parent>
<dependencies>
<dependency>
<groupId>org.springframework.boot</groupId>
<artifactId>spring-boot-starter-web</artifactId>
</dependency>
</dependencies>
<build>
<plugins>
<plugin>
<groupId>org.springframework.boot</groupId>
<artifactId>spring-boot-maven-plugin</artifactId>
</plugin>
</plugins>
</build>
</project>
|
MainApplication主程序类:
1
2
3
4
5
6
7
8
9
10
11
| import org.springframework.boot.SpringApplication;
import org.springframework.boot.autoconfigure.SpringBootApplication;
import org.springframework.context.ConfigurableApplicationContext;
@SpringBootApplication
public class MainApplication {
public static void main(String[] args) {
ConfigurableApplicationContext run = SpringApplication.run(MainApplication.class,args);
}
}
|
Pet类:
1
2
3
4
5
6
7
8
9
10
11
12
13
14
15
16
17
18
19
20
21
22
23
24
25
26
| public class Pet {
private String name;
public Pet() {
}
public Pet(String name) {
this.name = name;
}
public String getName() {
return name;
}
public void setName(String name) {
this.name = name;
}
@Override
public String toString() {
return "Pet{" +
"name='" + name + '\'' +
'}';
}
}
|
User类:
1
2
3
4
5
6
7
8
9
10
11
12
13
14
15
16
17
18
19
20
21
22
23
24
25
26
27
28
29
30
31
32
33
34
35
36
37
| public class User {
private String name;
private Integer age;
public User() {
}
public User(String name, Integer age) {
this.name = name;
this.age = age;
}
public String getName() {
return name;
}
public void setName(String name) {
this.name = name;
}
public Integer getAge() {
return age;
}
public void setAge(Integer age) {
this.age = age;
}
@Override
public String toString() {
return "User{" +
"name='" + name + '\'' +
", age=" + age +
'}';
}
}
|
底层注解
@Configuration
用于配置类声明。
在src/main/java/boot/config目录下创建配置类MyConfig:
1
2
3
4
5
6
7
| import org.springframework.context.annotation.Configuration;
@Configuration(proxyBeanMethods = true)
public class MyConfig {
}
|
说明:
- Full(proxyBeanMethods = true):保证每个@Bean方法被调用多少次返回的组件都是单实例的(不写默认为true)
- Lite(proxyBeanMethods = false):每个@Bean方法被调用多少次返回的组件都是新创建的
@Bean
给容器中注册组件.
编写配置类MyConfig:
1
2
3
4
5
6
7
8
9
10
11
12
13
14
15
16
17
18
| import boot.bean.Pet;
import boot.bean.User;
import org.springframework.context.annotation.Bean;
import org.springframework.context.annotation.Configuration;
@Configuration
public class MyConfig {
@Bean
public User user01() {
return new User("zhangsan",18);
}
@Bean("tom")
public Pet tomcatPet() {
return new Pet("tomcat");
}
}
|
说明:
测试,编写主程序MainApplication:
1
2
3
4
5
6
7
8
9
10
11
12
13
14
15
16
17
18
19
20
21
22
23
24
25
26
27
28
29
30
31
| import boot.bean.Pet;
import boot.bean.User;
import boot.config.MyConfig;
import org.springframework.boot.SpringApplication;
import org.springframework.boot.autoconfigure.SpringBootApplication;
import org.springframework.context.ConfigurableApplicationContext;
@SpringBootApplication
public class MainApplication {
public static void main(String[] args) {
ConfigurableApplicationContext run = SpringApplication.run(MainApplication.class,args);
String[] names = run.getBeanDefinitionNames();
for (String name : names) {
System.out.println(name);
}
User user01 = run.getBean("user01", User.class);
Pet tom01 = run.getBean("tom", Pet.class);
Pet tom02 = run.getBean("tom", Pet.class);
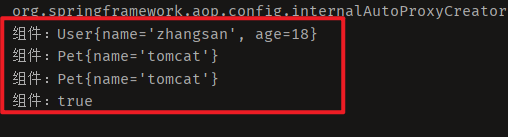
System.out.println("组件:" + user01);
System.out.println("组件:" + tom01);
System.out.println("组件:" + tom02);
System.out.println("组件:" + (tom01 == tom02));
}
}
|
运行,结果如下:
配置类本身也是组件
编写主程序MainApplication:
1
2
3
4
5
6
7
8
9
10
11
12
13
14
15
16
17
| import boot.config.MyConfig;
import org.springframework.boot.SpringApplication;
import org.springframework.boot.autoconfigure.SpringBootApplication;
import org.springframework.context.ConfigurableApplicationContext;
@SpringBootApplication
public class MainApplication {
public static void main(String[] args) {
ConfigurableApplicationContext run = SpringApplication.run(MainApplication.class,args);
MyConfig bean = run.getBean(MyConfig.class);
System.out.println(bean);
}
}
|
运行,结果如下:

组件依赖
@Configuration注解中proxyBeanMethods参数主要用于组件依赖的场景。
修改User类,添加Pet变量,并重写getter()、setter()以及toString()方法:
1
2
3
4
5
6
7
8
9
10
11
12
13
14
15
16
17
18
19
20
21
22
23
24
25
26
27
28
29
30
31
32
33
34
35
36
37
38
39
40
41
42
43
44
45
46
47
| public class User {
private String name;
private Integer age;
private Pet pet;
public User() {
}
public User(String name, Integer age) {
this.name = name;
this.age = age;
}
public String getName() {
return name;
}
public void setName(String name) {
this.name = name;
}
public Integer getAge() {
return age;
}
public void setAge(Integer age) {
this.age = age;
}
public Pet getPet() {
return pet;
}
public void setPet(Pet pet) {
this.pet = pet;
}
@Override
public String toString() {
return "User{" +
"name='" + name + '\'' +
", age=" + age +
", pet=" + pet +
'}';
}
}
|
编写配置类MyConfig:
1
2
3
4
5
6
7
8
9
10
11
12
13
14
15
16
17
18
19
20
| import boot.bean.Pet;
import boot.bean.User;
import org.springframework.context.annotation.Bean;
import org.springframework.context.annotation.Configuration;
@Configuration(proxyBeanMethods = true)
public class MyConfig {
@Bean
public User user01() {
User zhangsan = new User("zhangsan",18);
zhangsan.setPet(tomcatPet());
return zhangsan;
}
@Bean("tom")
public Pet tomcatPet() {
return new Pet("tomcat");
}
}
|
编写主程序MainApplication:
1
2
3
4
5
6
7
8
9
10
11
12
13
14
15
16
17
18
19
20
21
| import boot.bean.Pet;
import boot.bean.User;
import boot.config.MyConfig;
import org.springframework.boot.SpringApplication;
import org.springframework.boot.autoconfigure.SpringBootApplication;
import org.springframework.context.ConfigurableApplicationContext;
@SpringBootApplication
public class MainApplication {
public static void main(String[] args) {
ConfigurableApplicationContext run = SpringApplication.run(MainApplication.class,args);
User user01 = run.getBean("user01", User.class);
Pet tom = run.getBean("tom", Pet.class);
System.out.println("用户的宠物:" + (user01.getPet() == tom));
}
}
|
运行主程序,如果proxyBeanMethods = true,则结果如下:
如果proxyBeanMethods = false,则结果如下:
说明:
- 单例模式和多例模式的区别
- 如果为true,则组件会直接在容器内创建实例,其他组件可以直接使用该实例
- 如果一个组件不依赖于另一个组件,则建议采用false。在启动时不会扫描组件依赖,更快
原始注解
| 注解 |
说明 |
| @Component |
使用在类上用于实例化Bean |
| @Controller |
使用在web层类上用于实例化Bean |
| @Service |
使用在service层类上用于实例化Bean |
| @Repository |
使用在dao层类上用于实例化Bean |
| @ComponentScan |
用于指定Spring在初始化容器时要扫描的包 |
上述表格中展示的原始注解也都可以使用。
@Import
在任意组件的类上添加该注解,用于导入指定组件(参数为一个数组,可导入多个)
编写配置类MyConfig:
1
2
3
4
5
6
7
8
9
10
11
12
13
14
15
16
17
18
19
20
21
22
| import boot.bean.Pet;
import boot.bean.User;
import org.springframework.context.annotation.Bean;
import org.springframework.context.annotation.Configuration;
import org.springframework.context.annotation.Import;
@Import({User.class})
@Configuration(proxyBeanMethods = true)
public class MyConfig {
@Bean
public User user01() {
User zhangsan = new User("zhangsan",18);
zhangsan.setPet(tomcatPet());
return zhangsan;
}
@Bean("tom")
public Pet tomcatPet() {
return new Pet("tomcat");
}
}
|
编写主程序MainApplication:
1
2
3
4
5
6
7
8
9
10
11
12
13
14
15
16
17
18
19
20
21
22
23
24
25
| package boot;
import boot.bean.Pet;
import boot.bean.User;
import boot.config.MyConfig;
import org.springframework.boot.SpringApplication;
import org.springframework.boot.autoconfigure.SpringBootApplication;
import org.springframework.context.ConfigurableApplicationContext;
@SpringBootApplication
public class MainApplication {
public static void main(String[] args) {
ConfigurableApplicationContext run = SpringApplication.run(MainApplication.class,args);
String[] beanNamesForType = run.getBeanNamesForType(User.class);
System.out.println("====");
for (String s : beanNamesForType) {
System.out.println(s);
}
}
}
|
运行,结果如下:
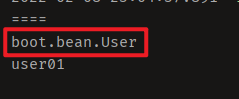
说明:默认组件的名字就是全类名
@Conditional
满足Conditional指定的条件,才进行组件注入。
Conditional又派生了许多注解,如下图:
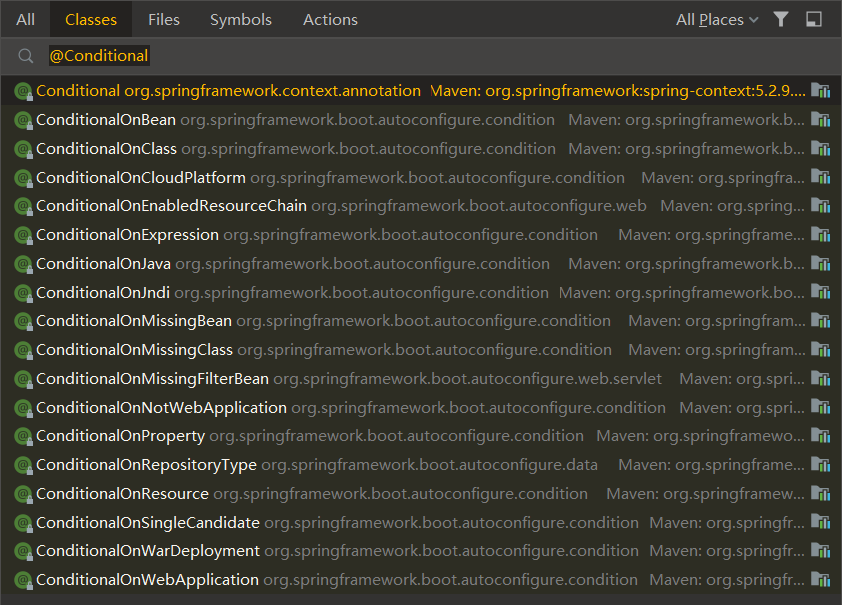
下面以@ConditionalOnBean为例:
编写配置类MyConfig:
1
2
3
4
5
6
7
8
9
10
11
12
13
14
15
16
17
18
19
20
21
22
23
24
| import boot.bean.Pet;
import boot.bean.User;
import org.springframework.boot.autoconfigure.condition.ConditionalOnBean;
import org.springframework.context.annotation.Bean;
import org.springframework.context.annotation.Configuration;
import org.springframework.context.annotation.Import;
@Import({User.class})
@Configuration(proxyBeanMethods = true)
public class MyConfig {
@Bean
public User user01() {
User zhangsan = new User("zhangsan",18);
zhangsan.setPet(tomcatPet());
return zhangsan;
}
@ConditionalOnBean(name = "user01")
@Bean("tom")
public Pet tomcatPet() {
return new Pet("tomcat");
}
}
|
编写主程序MainApplication:
1
2
3
4
5
6
7
8
9
10
11
12
13
14
15
16
17
18
19
20
21
22
| import boot.bean.Pet;
import boot.bean.User;
import boot.config.MyConfig;
import org.springframework.boot.SpringApplication;
import org.springframework.boot.autoconfigure.SpringBootApplication;
import org.springframework.context.ConfigurableApplicationContext;
@SpringBootApplication
public class MainApplication {
public static void main(String[] args) {
ConfigurableApplicationContext run = SpringApplication.run(MainApplication.class,args);
boolean tom = run.containsBean("tom");
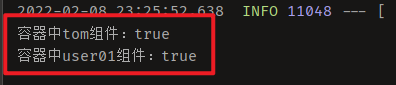
System.out.println("容器中tom组件:" + tom);
boolean user01 = run.containsBean("user01");
System.out.println("容器中user01组件:" + user01);
}
}
|
测试,运行结果如下:
如果将不注册user01组件,那么也不会注册user组件
1
2
3
4
5
6
7
8
9
10
11
12
13
14
15
16
17
18
19
20
21
22
23
24
| import boot.bean.Pet;
import boot.bean.User;
import org.springframework.boot.autoconfigure.condition.ConditionalOnBean;
import org.springframework.context.annotation.Bean;
import org.springframework.context.annotation.Configuration;
import org.springframework.context.annotation.Import;
@Import({User.class})
@Configuration(proxyBeanMethods = true)
public class MyConfig {
public User user01() {
User zhangsan = new User("zhangsan",18);
zhangsan.setPet(tomcatPet());
return zhangsan;
}
@ConditionalOnBean(name = "user01")
@Bean("tom")
public Pet tomcatPet() {
return new Pet("tomcat");
}
}
|
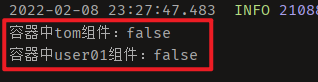
注意:需要注意组件注册顺序,否则可能失效
@ImportResource
可以引入原生xml配置文件。在配置类上添加该注解:
@ImportResource("classpath:xxx")
配置绑定
使用Java读取到properties文件中的内容,并且把它封装到JavaBean中(将配置文件的内容与组件相绑定),可以使用注解@ConfigurationProperties。
有两种绑定方式:
-
@Component + @ConfigurationProperties
首先在src/main/java/boot/bean目录下编写Car类:
1
2
3
4
5
6
7
8
9
10
11
12
13
14
15
16
17
18
19
20
21
22
23
24
25
26
27
28
29
30
31
32
33
34
35
36
37
38
39
40
41
42
| import org.springframework.boot.context.properties.ConfigurationProperties;
import org.springframework.stereotype.Component;
@Component
@ConfigurationProperties(prefix = "mycar")
public class Car {
private String brand;
private Integer price;
public Car() {
}
public Car(String brand, Integer price) {
this.brand = brand;
this.price = price;
}
public String getBrand() {
return brand;
}
public void setBrand(String brand) {
this.brand = brand;
}
public Integer getPrice() {
return price;
}
public void setPrice(Integer price) {
this.price = price;
}
@Override
public String toString() {
return "Car{" +
"brand='" + brand + '\'' +
", price=" + price +
'}';
}
}
|
在src/main/resources目录下编写application.properties配置文件:
1
2
| mycar.brand=BYD
mycar.price=100000
|
说明:
@ConfigurationProperties(prefix = “mycar”)匹配前缀,将配置文件中的值注入到JavaBean中
在src/main/java/boot/controller目录下编写HelloController测试类:
1
2
3
4
5
6
7
8
9
10
11
12
13
14
15
16
17
18
19
20
21
22
23
24
| import boot.bean.Car;
import org.springframework.beans.factory.annotation.Autowired;
import org.springframework.context.annotation.Bean;
import org.springframework.stereotype.Controller;
import org.springframework.web.bind.annotation.RequestMapping;
import org.springframework.web.bind.annotation.ResponseBody;
import org.springframework.web.bind.annotation.RestController;
@RestController
public class HelloController {
@Autowired
Car car;
@RequestMapping("/car")
public Car car() {
return car;
}
@RequestMapping("/hello")
public String handle01() {
return "Hello, SpringBoot2!";
}
}
|
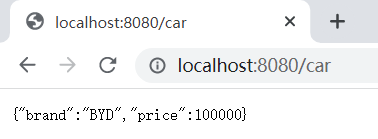
执行主程序,浏览器访问:http://localhost:8080/car
可以看到绑定成功
-
@EnableConfigurationProperties + @ConfigurationProperties
编写Car类:
1
2
3
4
5
6
7
8
9
10
11
12
13
14
15
16
17
18
19
20
21
22
23
24
25
26
27
28
29
30
31
32
33
34
35
36
37
38
39
40
41
| import org.springframework.boot.context.properties.ConfigurationProperties;
import org.springframework.stereotype.Component;
@ConfigurationProperties(prefix = "mycar")
public class Car {
private String brand;
private Integer price;
public Car() {
}
public Car(String brand, Integer price) {
this.brand = brand;
this.price = price;
}
public String getBrand() {
return brand;
}
public void setBrand(String brand) {
this.brand = brand;
}
public Integer getPrice() {
return price;
}
public void setPrice(Integer price) {
this.price = price;
}
@Override
public String toString() {
return "Car{" +
"brand='" + brand + '\'' +
", price=" + price +
'}';
}
}
|
编写配置类MyConfig:
1
2
3
4
5
6
7
8
9
10
11
12
13
14
15
16
17
18
19
20
21
22
23
24
25
26
27
28
| package boot.config;
import boot.bean.Car;
import boot.bean.Pet;
import boot.bean.User;
import org.springframework.boot.autoconfigure.condition.ConditionalOnBean;
import org.springframework.boot.context.properties.EnableConfigurationProperties;
import org.springframework.context.annotation.Bean;
import org.springframework.context.annotation.Configuration;
import org.springframework.context.annotation.Import;
import org.springframework.context.annotation.ImportResource;
@Configuration
@EnableConfigurationProperties(Car.class)
public class MyConfig {
@Bean
public User user01() {
User zhangsan = new User("zhangsan",18);
zhangsan.setPet(tomcatPet());
return zhangsan;
}
@Bean("tom")
public Pet tomcatPet() {
return new Pet("tomcat");
}
}
|
后记
挖个坑,提醒看源码。
 微信
微信 支付宝
支付宝